Friday, May 11, 2012

Mothers Day Ideas

Stumped on what to do/make for that special Mom in your life this year?  Check out a few of our old posts for some inspiration!!

If you've got little one's this is a GREAT way for them to do something special and fun for Mom!!

Does Mom love DQ Ice Cream cake?  If so check out this delicious alternative
(kids would love to help out here too!)

What Mom doesn't love a handmade gift?  Check out this easy Flower Headband from an old T-shirt!

Another Beautiful flower you can DIY at home - it's sew simple!

Looking for more ideas?  Check out some of our Popular Posts on the right side of the blog!


Happy Mothers Day Everyone!

Wednesday, May 9, 2012

Dollar Store Craft: Hot Pad Hand Towel Tutorial

How about a low cost, highly useful, simple Mom's Day gift idea?  
A no slip hand towel for your oven door handle.  Best part is you can get everything you need at the Dollar Store - Total Cost $1.50!!  Plus its personal - pick the color and theme to match the receiver!


Here is what you need:
1 - Hot Pad

1 - Hand Towel
1 - Button
Needle/Thread/Sewing Machine/Straight pins

Step 1 - find the center of the hot pad (on the side you don't want to see) fold hot pad in half (I like to stick straight pins in along the crease and/or make a pencil mark so my seam will be straight.


Step 2 - Pin the Center fold of the towel to the center fold of the hot pad.

Step 3 - Sew a straight line right along your pinned/penciled line.

Step 4 - Sew your button to the side of the hot pad without the loop (the loop will act as your button hole).


Step 5 - Step back and check out your handy work!


It's SEW easy!! 

Cost - supplies purchased at Dollar Tree
$1.00 Towel
$1.00 2 pack of hot pads
Had thread, button, pins and sewing machine.

I love these things, never have to worry about my towel coming unfolded or slipping off my oven door handle.   This one was inspired by my MOM - Happy Mothers Day!!

Tuesday, May 8, 2012

Tasty Tuesday - 45 minute Mega-Moist Pork Pot Roast with Apples & Onions


 45 minute 
Mega-Moist Pressure Cooker Pork Pot Roast 
with Apples & Onions


Do you have a pressure cooker? I often forget to get mine out & use it...maybe since I use my slow cooker so much. Well recently I found some basic tips on how to cook pork in a pressure cooker...(wish I would've saved the site, it was really helpful). I took those tips & ran with the idea of adding onion, juice, spices & apples. It turned out AMAZING!! I was very impressed with what I had done. I don't mean to brag, but it's like something out of a Martha Stewart cookbook, people!!! The roast is incredibly moist & the onions caramelize over & under it. Then once blended with the flavor of the apples & the spices...ohhhh wow! It's perfect! We've made this a few times now & recently I added red-skinned potatoes - that was a nice addition too! Hope you can try this recipe & enjoy it as much as we do. -Julie

Ingredients
1 1/2 - 2 1/2 pound pork shoulder roast
1/4 tsp fennel seed
1/2 teaspoon cumin
1/2 teaspoon salt
1/2 teaspoon black pepper
2 tablespoons olive oil
1 medium onion, cut into wedges
1 cup water
3/4 cup apple juice
2 medium cooking apples, cut into wedges
Combine & mix Fennel, cumin, salt, and black pepper. Rub over meat.

In a 4- or 6-quart pressure cooker heat 1 tablespoon of the oil
over medium heat. Cook meat until brown on all sides. Add more
oil, if needed. Remove the meat and set aside.

Place the rack in the pressure cooker. Return the meat to the
pressure cooker and add the onion, water, and apple
juice.

Lock lid in place. Over high heat, bring your pressure cooker up to pressure. Reduce heat to medium (pressure regulator should rock gently) Cook for 40 minutes.

Allow pressure to come down (I press the vent on my pressure cooker to release the pressure) Carefully remove lid. Transfer meat & onions onto a serving platter.

Add apples to pressure cooker. Bring to boiling. Cover loosely (do
not lock lid) and cook over medium heat about 5 minutes or until
apples are crisp-tender. Spoon over the pork roast.

  Makes 4-5 main-dish servings.

Linking up all over! Check it out!

Monday, May 7, 2012

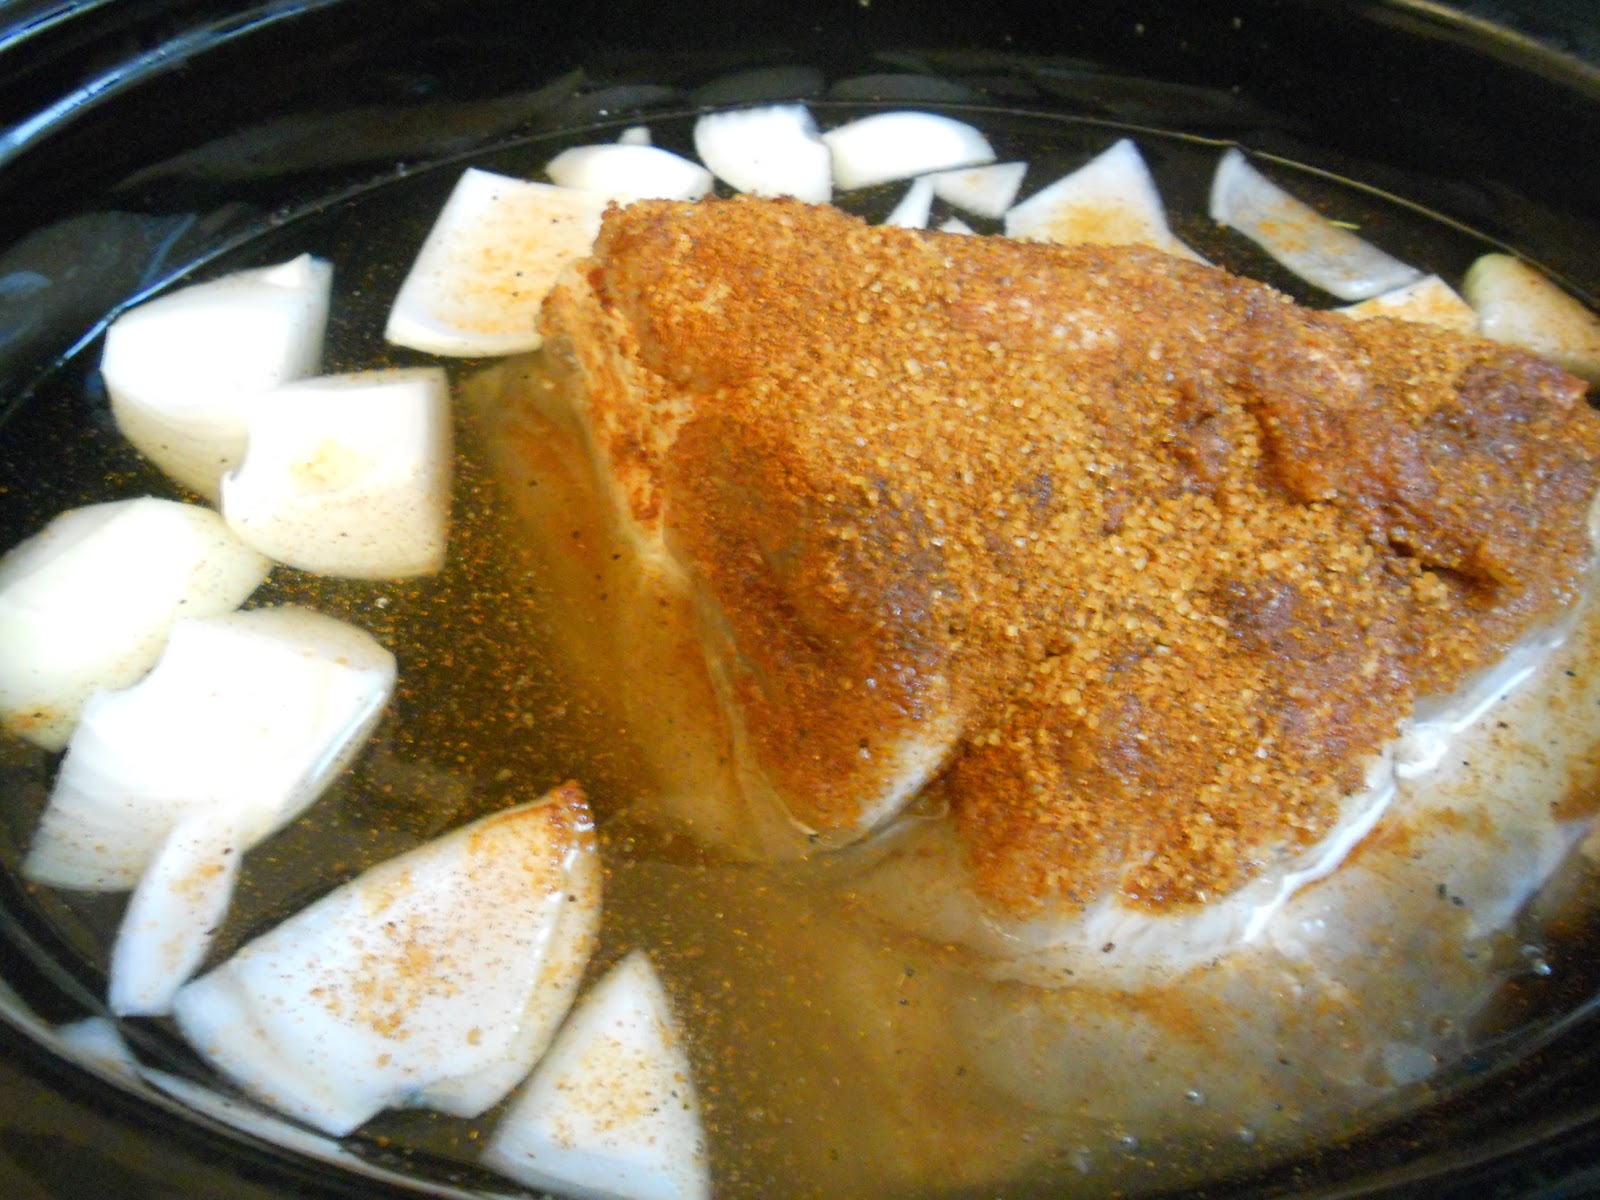
Easy Pulled Pork Recipe

Share with Mom a recipe that will really impress her!  Plus you can put it in the crock pot, spend all day with her and shred it up that night!


  If you've seen the show Diner's Drive-in's and Dives you've seen the delicious results of many hours of soaking meat in a brine.  This recipe is SO simple with amazing results.  
This is my version of pulled pork.


Pulled Pork Brine

-Pork Shoulder (any size works - I buy a large one so can freeze half my pulled pork)
-Apple Cider Vinegar (I get the big jug)
-Water
-1/4 c Sea Salt (I'm sure you can use normal salt I just prefer this)
-1 lg onion
-1/2 brown sugar


-Place Pork Shoulder in Crock pot.  Cover with a 2 to 1 ratio of Vinegar and water 
(fill crock 2/3 full of vinegar and then water until roast is nearly covered)
-Sprinkle salt and brown sugar in the water
-Cut onion into large chunks and place in crock pot
-Place crock pot in fridge for 12-24 hours to brine.


After brine time cook in crock pot on low 9-10 hours.  Remove pork from crock pot, remove skin, shred pork in a large dish.  I like to take 1 cup of the left over brine mix it with about 1/4 cup of brown sugar and mix that into my shredded pork for a more moist meat.


The great thing about this recipe is you can often find a pork shoulder for under 1.00 a lb and it freeze's perfectly. 

Sunday, May 6, 2012

Mothers Day Gift Ideas: Sunday Morning White Chocolate Scones

I love a nice warm scone... 
What a perfect afternoon tea for Mom's Day or even a great breakfast served by  a sweet girl.

Julie - check out the 'green' cup - she chose it because it's Keston's favorite color.

What is a Scone? Per Wikipedia 'The scone is a small British quick bread, traditionally hailing from both Scotland and the South West England. They are usually made of wheatbarley or oatmeal, with baking powder as a leavening agent. The scone is a basic component of the cream tea or Devonshire tea.'

My only obstacle with making scones is that normally they require buttermilk or whipping cream (two items I don't keep in my pantry on a normal basis).  I discovered a simple Scottish Scone recipe and tweaked it to our preferences.

NOTE: Key to a light and flaky scone is to NOT overwork the dough.


Milk & White Chocolate Scone

1 3/4 c flour
4 t baking powder
1/4 c sugar
1/8 salt
Sift these ingredients together (yes, you need to sift).


5 T unsalted butter
Cut this into tiny squares then cut into the flour mixture with a pastry cutter or if you don't have one you can 'rub' the butter into the flour (which is the method I used).  Rub or cut until you have tiny pea sized balls (there will still be loose flour so don't feel like you need to get it all into little balls).


1/4 c White Choc Chips
1/4 c Milk Choc Chips
Pour these into your flour/butter mixture - no need to mix yet.


1/2 c milk
1/4 c sour cream
Mix these two ingredients together.  Then gently mix into the flour/chocolate mixture - this is where you do not want to over-mix.  Stir just until a ball forms or all the liquid is soaked up - it will look dry and you may have some loose flour - that's okay.


Place mixing bowl into freezer to re-harden the butter (this will make for a light flaky scone) for about 10 minutes
Preheat oven to 400 degrees.  
Line baking sheet with parchment paper.  Place scone dough in the center of baking sheet and shape into a ball.  Press ball down until flat (about 1 inch thickness all around).  I like to cut mine into 6-8 triangles (cut like a pie).  pull apart gently so there is a space between each slice.


1 egg
1 T milk
Mix these together.
Brush egg wash over each scone and let rest until oven is preheated.


Bake in preheated oven for 15-18 min until lightly brown (not dark) on top.  


I like to drizzle a little icing over the top while they are still warm (I mix 1/4 c powdered sugar with 1 t milk - you want it a little runny add more milk if it doesn't seem thin enough)


Check back later this week for even MORE sweet, easy and budget friendly Mom's Day Gifts!!

Wednesday, May 2, 2012

Picture Frame Dry Erase Board with Lace

Last Fall that I introduced you to my Homemade Dry Erase Board from an old picture frame.  Since then I've taken those simple Marker Boards all different directions.  My first attempts were successful using fabric, scrapbook paper or black and white pics as the backgrounds.

This one is a new take on Fabric and Paint!!


Check out my latest DIY Marker Board.  To reproduce this look you'll need:


1 old or new picture frame
1 can spray paint
Lace fabric (enough to cover your glass from the frame plus about an inch over hang on each side)
Painters Tape
Velcro spots
Dry Erase Marker


It's up to you if you want to paint your frame or leave it as it - personally I like to paint my frames and sometimes distress it (see above purple frame).  You'll want to remove the backing, current picture and glass before painting the frame.  


Make sure your glass is clean and free of your finger prints before starting this step.  Tape your lace to your glass - pulling snug otherwise you could end up with extra paint where the lace was loose.  I just love using lace as a stencil! 


Flip the glass over so the tape side is down.  Now you are ready to spray!  Remember to shake the can VERY well.  Use light even strokes going slightly past the edge of your project to get a clean even coating.  For these frames I did 3 coats of paint waiting about 1 min in between each coat (and shaking well between coats).  I let mine dry about 5 min before carefully removing ALL the painters tape and then peeling back the lace.


Once your paint is completely dry (about an hour but I prefer overnight).  Place the glass back in the frame with the unpainted side pointing outward - you want to be able to mark on the smooth side.  


For the white inside I used a piece of white wrapping paper - you could also use printer paper or a poster board cut to size.  Add your rough Velcro dot to the side of the frame and the soft Velcro side to your marker and stick.

You've got a super cute DIY Marker Board that could also be used as a piece of wall art!  If you're not in the DIY mood check out ReHab Fab in Van Wert where all of the above pieces are for sale.


~M~

Tuesday, May 1, 2012

Tasty Tuesday - Chocolate Dipped Fruit Pizza

Fruit pizza has to be one of the yummiest desserts EVER - do you agree? 


Here is how we made ours:


1-package sugar cookie mix (we used the dry mix in a bag and followed the instructions)
1-8oz Cream Cheese
1 C Powdered Sugar
1 t Vanilla
Fruit of your choice!  We used Raspberries, Strawberries and Mandarin Oranges.
2 T white chocolate chips & 2 T milk chocolate chips
Tiny bit of Crisco


  1. Preheat oven to 350 degrees). Place drops of cookie dough and arrange on greased pizza pan, overlapping edges. Press dough flat into pan. Bake for 10 to 12 minutes. Allow to cool.
  2. In a large bowl, soften cream cheese, then mix in sugar. Spread over cooled crust. You can chill for a while at this point, or continue by arranging the fruit.
  3. Arrange fruit in a circle around the outside edge. Continue with fruit of your choice, working towards the middle.
  4. Melt each chocolate separately in the microwave until melted and mix in enough Crisco to thin the chocolate (I used very little).
  5. Drizzle chocolate over fruit
  6. Refrigerate until ready to serve.


It's SO good and kids love to help!!  
Gabby made this for our family Easter all by herself  and it was Delicious!

A little note: we like to pick up low Dollar Tree pans for $1 and cover with parchment paper instead of greasing a good pan.  Saves time on clean up and taking home a dirty pan is never an easy task (somehow it always seems to end up upside down in the car).

Printer Friendly View

Related Posts Plugin for WordPress, Blogger...