Showing posts with label Recipes. Show all posts

Tuesday, October 9, 2012

Rolo Pretzel Bites Recipe


Rolo Pretzel Bites
(with Toasted Cinnamon Almonds)


Oh how I love friends who make yummy treats!! My friend Morgan recently made these tasty beauties and brought them along to a baby shower. So I snapped a few pics & decided I needed to share this recipe with our readers! This is one that will be perfect for the holidays! 
...and it's too simple to be true!!


INGREDIENTS

Rolos
Pretzels
A topping (such as almonds, cashews, m&m's, you decide)

DIRECTIONS
  • Preheat the oven to 350 degrees F.
  • Place mini pretzels on a large baking sheet. 
  • Unwrap the Rolos & top each pretzel with one Rolo candy. 
  • Place in the oven for 4-5 minutes, until Rolo candies start to melt - but don't melt them all the way.
  • Remove from oven & lightly press your topper on top of each Rolo (in this case she used toasted cinnamon almonds). 
  • Simply leave on your counter to allow the chocolate to set. (To speed up the process, chill in the freezer for 20 minutes.)


Thanks, Morgan - for sharing your LOVE with us in such a TASTY way!
Love,
Julie

Keep up with us on

Wednesday, August 15, 2012

Strawberry & Spinach Salad


  • Ingredients
  • 1 bag of spinach, rinsed
  • 3-4 cups sliced strawberries
  • 1/4 cup olive oil
  • 1/4 cup red wine vinegar
  • 1/4 cup white sugar

  • Optional: 3-4 tablespoons slivered almonds; 1 Tbsp poppy seeds; 
  • 1 large can drained mandarin oranges is a great substitute for strawberries.

  • Directions
  • Toss together the spinach and sliced strawberries. Set aside.
  • In a blender, combine the oil, vinegar, sugar & a couple strawberries. Blend for 1 minute.
  • When ready to serve, pour the blended dressing over the strawberries & spinach. Toss to coat - use the amount you prefer. 
  • Garnish with optional almond. Serve immediately. 

  • *This salad does not keep well in the fridge. The spinach will wilt with the dressing on it. But it will likely be devoured after you serve it anyway! It's sweet & delicious...and not to mention PRETTY & easy to throw together. At home we LOVE to serve it with grilled or bbq chicken. It's the only "salad" we can get our little boys to eat - hey, it's a start!
 
To print, use the 'Print Friendly' button below :)

Tuesday, May 29, 2012

Butterfinger Grape Dessert - Get your YUM on!

Butterfinger Grape Dessert - OMGoodness YUM! 

The warm weather makes we want to be outside ALL THE TIME - I'm loving it.  I'm also looking forward to family and friend gathering this summer (I'm sure you are too!).  Today I'm rewinding to share a INCREDIBLY EASY & YUMMY recipe I love to take to cook-outs and carry-in's!!


The first few times I saw this made I must be honest it did not look or sound appealing (at all!) My co-workers raved about it and continually made it for carry-in's.  Well, they were right.  This salad is definitely worth raving about.  In fact, there are never any leftovers.  Make this... its delicious!  I could honestly eat the entire dessert myself (True Story: I served it this weekend and put back a dish for after the party was over.  Needless to say my family hovered over my bowl begging for a bite!)Butterfingers Grape Dessert[Image]Ingredients:

4 lbs grapes (a mixture of green and red seedless)

1/2 c Brown Sugar sugar
8 oz cream cheese, softened
8 oz Cool Whip
Topping:
4 crushed Butterfingers candy bars (easily crushed if frozen and then put in a Ziploc back and hammered)


Directions: 

1.  Blend the cream cheese, sugar, and cool whip until smooth.  Mix in with the cleaned, whole grapes. 2.  Sprinkle crushed candy bar over the grape mixture right before serving.

I like to make the grape/cream cheese mixture the night before and leave my crushed Butterfingers in the freezer until I'm ready to serve. 
If you have had this you know how incredible every bite is, if you haven't you will want to try this recipe out (but make sure you hide a second helping away for later!)


Sunday, May 27, 2012

Hamburgers At Home

I don't know anyone who doesn't enjoy a great gourmet burger.  Check out this one that's so simple and delicious you'll want to make it again and again.


Gourmet Burgers at Home


-2lbs Ground Chuck
-2 eggs
-4 T Weber Gourmet Burger Seasoning
(you can also add some shredded cheese if you li,e)

Mix all ingredients with your hands in a bowl.  Form 6 large patties and get ready to grill.  If you don't have an outdoor grill you can always try a Double Burner Grill indoors.


Add some homemade fries to your menu too!  Cut 6 potatoes with an apple slicer drizzle with some EVOO and sprinkle with salt.  Bake on a cookie sheet at 400 for 45min (my kids love to make and eat these!)


~M~

Monday, May 21, 2012

Easy BBQ Chicken

We love BBQ.  Until I figured out this easy 3 ingredient recipe I was buying pre-made BBQ chicken at the grocery.  This recipe is so simple you'll never need to buy pre-made BBQ again!


BBQ Chicken

-4lbs Split Chicken Breast
-1 bottle your favorite BBQ sauce
-1 c water


Place chicken in crock pot (you can remove the skin now or it will peel off easily after it's cooked).  Add water and cook 8-10 hours on low.


Once cooked remove from crock pot and let cool until you are able to pull meat off the bone and remove the skin.  At this point it should basically fall of the bone.  Cut chicken into pieces with a knife and mix with BBQ sauce until you achieve the desired consistency.

We love to serve this atop a baked potato - check out Chicken Baker's here!

~M~

Monday, May 14, 2012

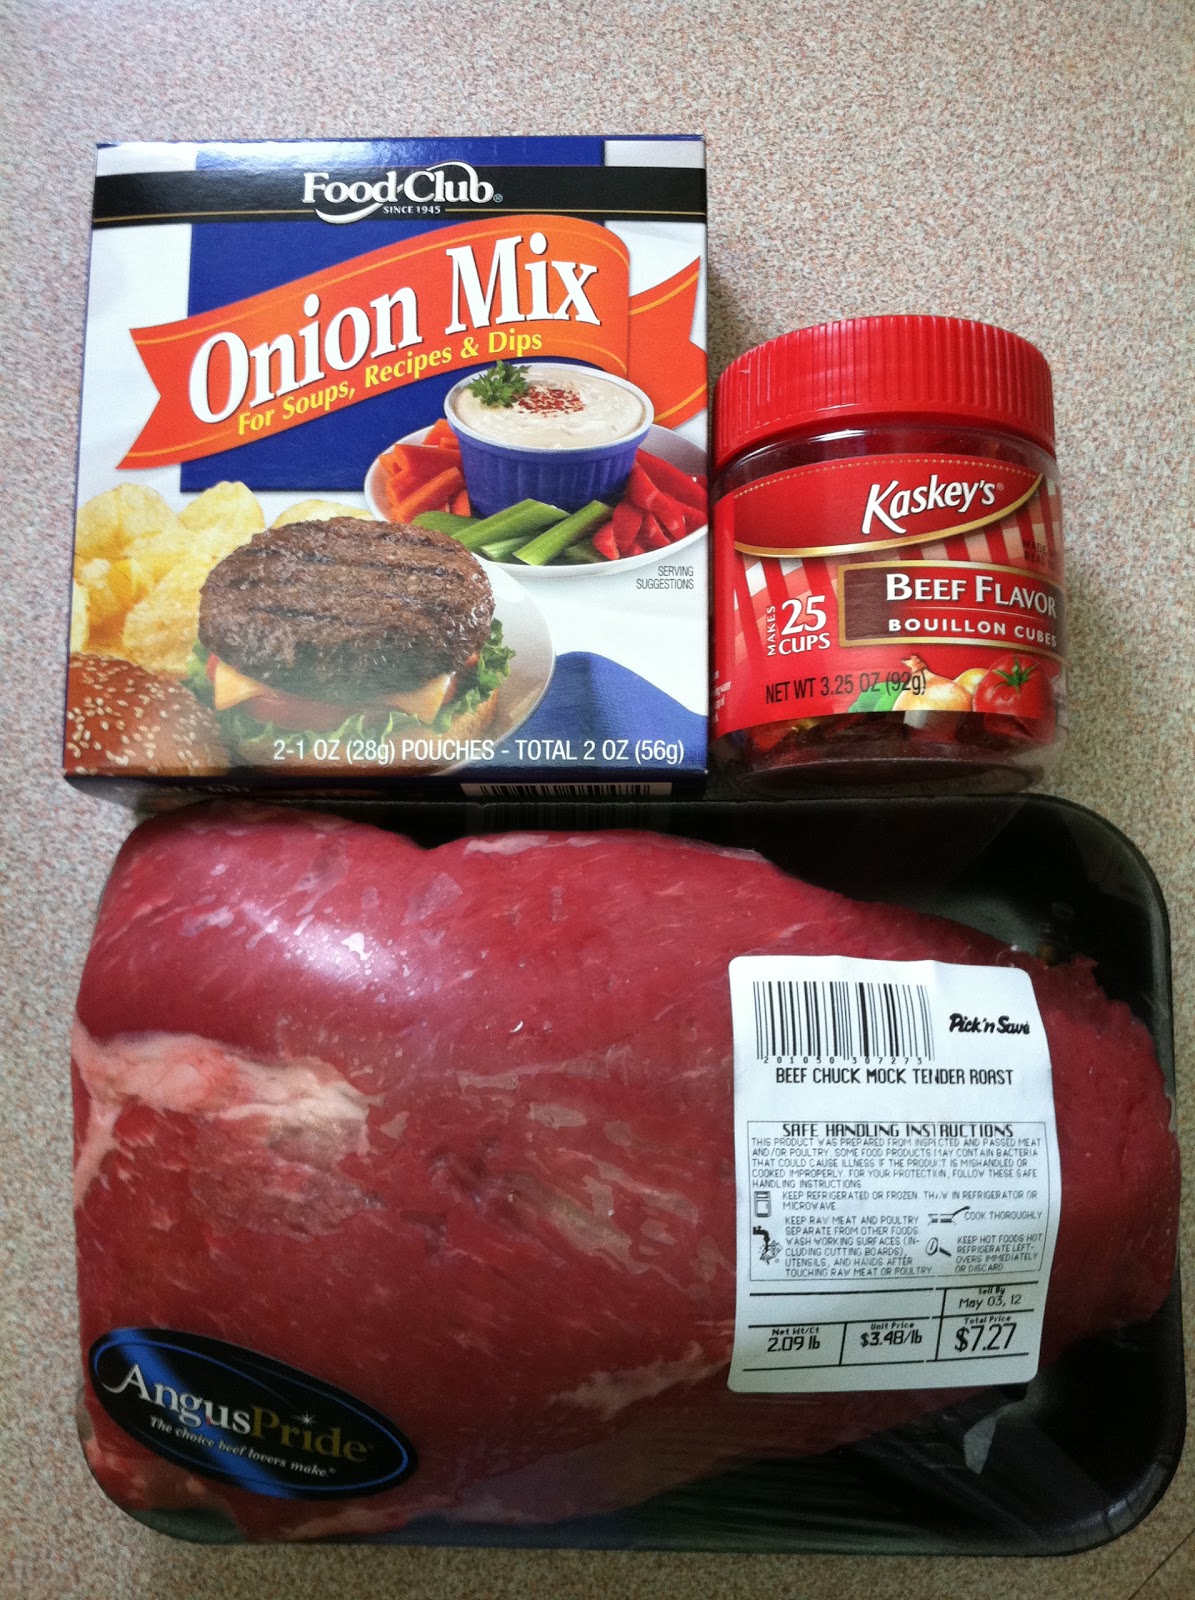
Easy French Dip Roast Beef Recipe


This month on Monday's it's all about the MEAT so get your crock pot's ready for some slow cooked goodness.

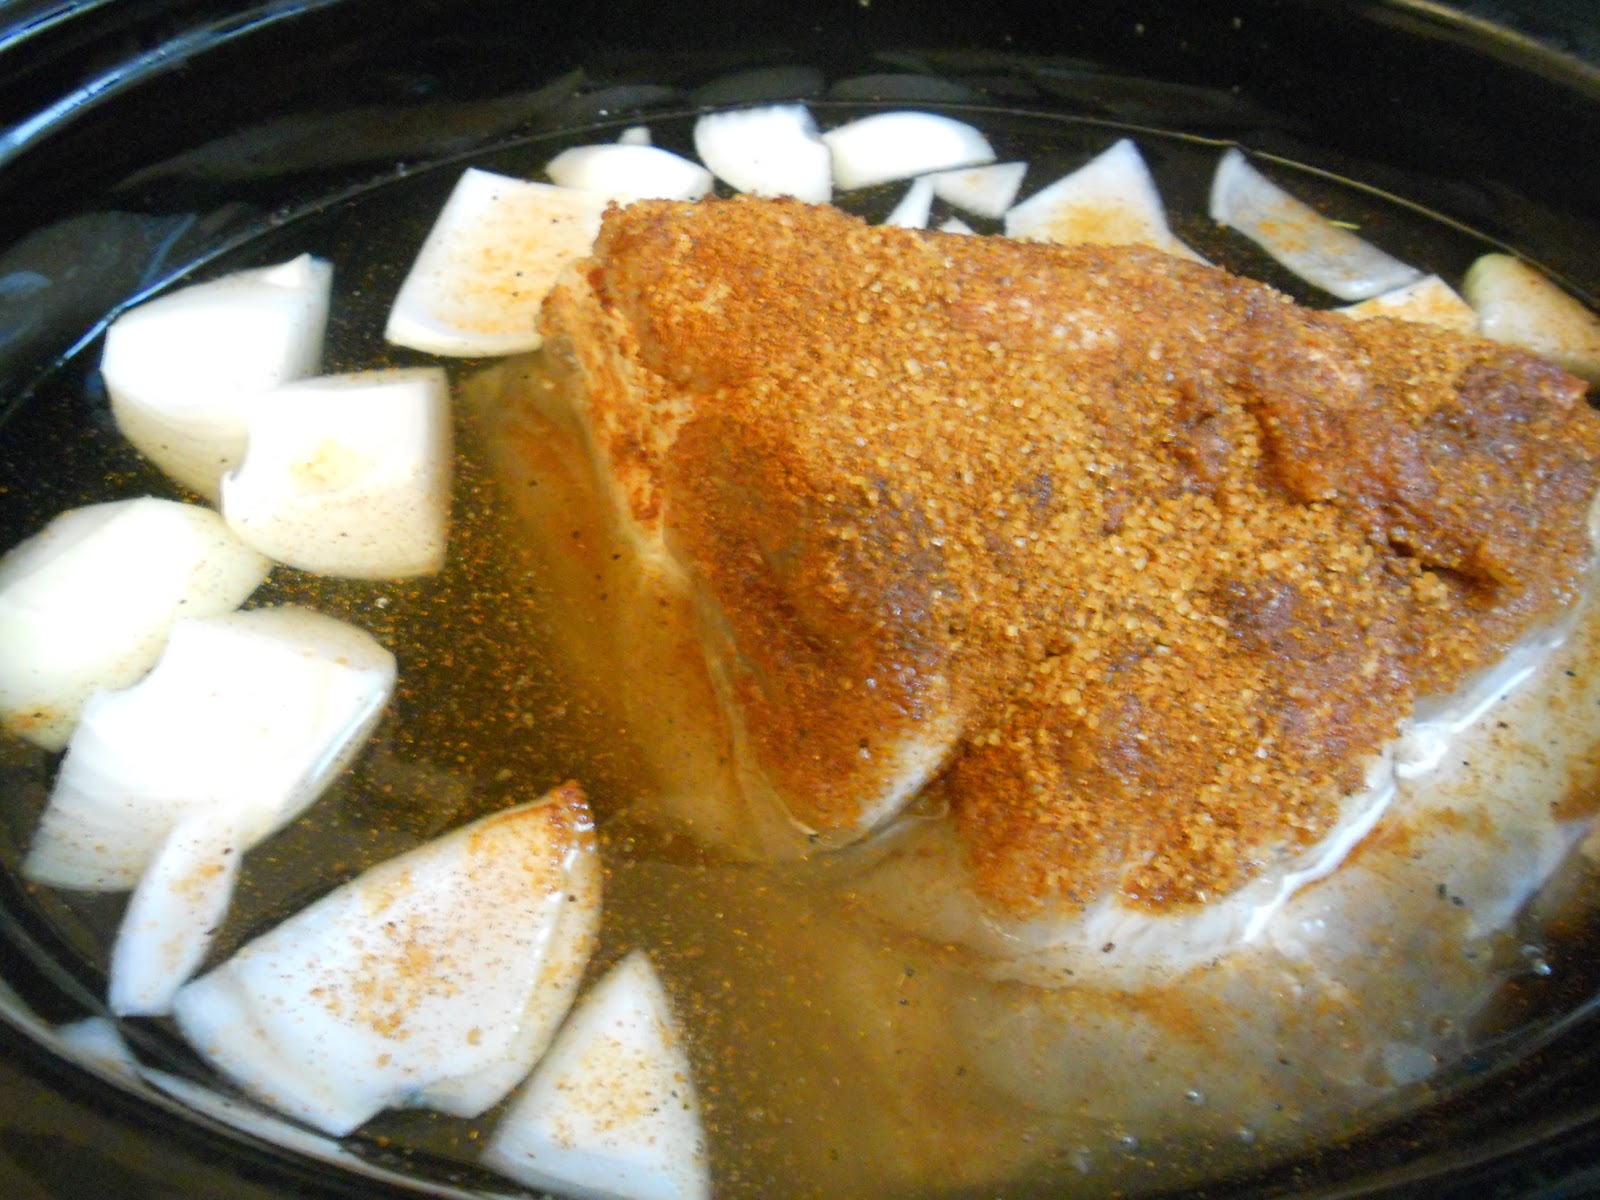
French Dip Roast Beef

-2lb Boneless Roast
-2 Beef Bullion Cubes
-1 Package Onion Soup Mix
-1 c Water


Place Roast in Crock Pot with soup mix and bullion cubes and cover with water.  Cook on low for 8-10 hours.  Roast will shred easily once cooked.  Serve on rolls or crusty bread (check out a easy bread recipe here).  Broth can be drained off into a small dish for dipping.  


If you have any left overs you can refrigerate the broth and shredded beef together (this is even better the second time around!)  Enjoy!


If you have time please VOTE for us #89 in One Artsy Mama's Contest.  Thanks!
HERE
One Artsy Mama


Our Entry #89

While you are there click on the picture to check out our tutorial to make your own!!
~M~

Tuesday, May 8, 2012

Tasty Tuesday - 45 minute Mega-Moist Pork Pot Roast with Apples & Onions


 45 minute 
Mega-Moist Pressure Cooker Pork Pot Roast 
with Apples & Onions


Do you have a pressure cooker? I often forget to get mine out & use it...maybe since I use my slow cooker so much. Well recently I found some basic tips on how to cook pork in a pressure cooker...(wish I would've saved the site, it was really helpful). I took those tips & ran with the idea of adding onion, juice, spices & apples. It turned out AMAZING!! I was very impressed with what I had done. I don't mean to brag, but it's like something out of a Martha Stewart cookbook, people!!! The roast is incredibly moist & the onions caramelize over & under it. Then once blended with the flavor of the apples & the spices...ohhhh wow! It's perfect! We've made this a few times now & recently I added red-skinned potatoes - that was a nice addition too! Hope you can try this recipe & enjoy it as much as we do. -Julie

Ingredients
1 1/2 - 2 1/2 pound pork shoulder roast
1/4 tsp fennel seed
1/2 teaspoon cumin
1/2 teaspoon salt
1/2 teaspoon black pepper
2 tablespoons olive oil
1 medium onion, cut into wedges
1 cup water
3/4 cup apple juice
2 medium cooking apples, cut into wedges
Combine & mix Fennel, cumin, salt, and black pepper. Rub over meat.

In a 4- or 6-quart pressure cooker heat 1 tablespoon of the oil
over medium heat. Cook meat until brown on all sides. Add more
oil, if needed. Remove the meat and set aside.

Place the rack in the pressure cooker. Return the meat to the
pressure cooker and add the onion, water, and apple
juice.

Lock lid in place. Over high heat, bring your pressure cooker up to pressure. Reduce heat to medium (pressure regulator should rock gently) Cook for 40 minutes.

Allow pressure to come down (I press the vent on my pressure cooker to release the pressure) Carefully remove lid. Transfer meat & onions onto a serving platter.

Add apples to pressure cooker. Bring to boiling. Cover loosely (do
not lock lid) and cook over medium heat about 5 minutes or until
apples are crisp-tender. Spoon over the pork roast.

  Makes 4-5 main-dish servings.

Linking up all over! Check it out!

Monday, May 7, 2012

Easy Pulled Pork Recipe

Share with Mom a recipe that will really impress her!  Plus you can put it in the crock pot, spend all day with her and shred it up that night!


  If you've seen the show Diner's Drive-in's and Dives you've seen the delicious results of many hours of soaking meat in a brine.  This recipe is SO simple with amazing results.  
This is my version of pulled pork.


Pulled Pork Brine

-Pork Shoulder (any size works - I buy a large one so can freeze half my pulled pork)
-Apple Cider Vinegar (I get the big jug)
-Water
-1/4 c Sea Salt (I'm sure you can use normal salt I just prefer this)
-1 lg onion
-1/2 brown sugar


-Place Pork Shoulder in Crock pot.  Cover with a 2 to 1 ratio of Vinegar and water 
(fill crock 2/3 full of vinegar and then water until roast is nearly covered)
-Sprinkle salt and brown sugar in the water
-Cut onion into large chunks and place in crock pot
-Place crock pot in fridge for 12-24 hours to brine.


After brine time cook in crock pot on low 9-10 hours.  Remove pork from crock pot, remove skin, shred pork in a large dish.  I like to take 1 cup of the left over brine mix it with about 1/4 cup of brown sugar and mix that into my shredded pork for a more moist meat.


The great thing about this recipe is you can often find a pork shoulder for under 1.00 a lb and it freeze's perfectly. 

Sunday, May 6, 2012

Mothers Day Gift Ideas: Sunday Morning White Chocolate Scones

I love a nice warm scone... 
What a perfect afternoon tea for Mom's Day or even a great breakfast served by  a sweet girl.

Julie - check out the 'green' cup - she chose it because it's Keston's favorite color.

What is a Scone? Per Wikipedia 'The scone is a small British quick bread, traditionally hailing from both Scotland and the South West England. They are usually made of wheat, barley or oatmeal, with baking powder as a leavening agent. The scone is a basic component of the cream tea or Devonshire tea.'

My only obstacle with making scones is that normally they require buttermilk or whipping cream (two items I don't keep in my pantry on a normal basis).  I discovered a simple Scottish Scone recipe and tweaked it to our preferences.

NOTE: Key to a light and flaky scone is to NOT overwork the dough.


Milk & White Chocolate Scone

1 3/4 c flour
4 t baking powder
1/4 c sugar
1/8 salt
Sift these ingredients together (yes, you need to sift).


5 T unsalted butter
Cut this into tiny squares then cut into the flour mixture with a pastry cutter or if you don't have one you can 'rub' the butter into the flour (which is the method I used).  Rub or cut until you have tiny pea sized balls (there will still be loose flour so don't feel like you need to get it all into little balls).


1/4 c White Choc Chips
1/4 c Milk Choc Chips
Pour these into your flour/butter mixture - no need to mix yet.


1/2 c milk
1/4 c sour cream
Mix these two ingredients together.  Then gently mix into the flour/chocolate mixture - this is where you do not want to over-mix.  Stir just until a ball forms or all the liquid is soaked up - it will look dry and you may have some loose flour - that's okay.


Place mixing bowl into freezer to re-harden the butter (this will make for a light flaky scone) for about 10 minutes
Preheat oven to 400 degrees.  
Line baking sheet with parchment paper.  Place scone dough in the center of baking sheet and shape into a ball.  Press ball down until flat (about 1 inch thickness all around).  I like to cut mine into 6-8 triangles (cut like a pie).  pull apart gently so there is a space between each slice.


1 egg
1 T milk
Mix these together.
Brush egg wash over each scone and let rest until oven is preheated.


Bake in preheated oven for 15-18 min until lightly brown (not dark) on top.  


I like to drizzle a little icing over the top while they are still warm (I mix 1/4 c powdered sugar with 1 t milk - you want it a little runny add more milk if it doesn't seem thin enough)


Check back later this week for even MORE sweet, easy and budget friendly Mom's Day Gifts!!

Tuesday, April 24, 2012

Tasty Tuesday - No Knead Bread

No Knead Bread

This has got to be the simplest Bread recipe I have ever tried!!  I LOVE making bread. When I made this, I tripled the recipe! If I'm going to make bread or do any baking, I like to make one GIANT mess about once a month and freeze the extras.

Ingredients
1 1/2 tsp Active Dry Yeast
1/2 cup Flour
1/2 cup Warm Water
Stir these together and let sit for about 30 min.

1 (12oz bottle) Beer
4 c Flour
1 1/2 tsp Sea Salt
Mix these into the yeast mixture until a sticky dough forms.  Cover and let rise 2 hours or until it doubles.

Place dough on a well-floured surface.  Flour the top of the dough and form into a loaf.  
(I cut the dough in half to make 2 loaves out of one recipe)


Sprinkle baking sheet (be very generous) with cornmeal.  Place loaf on top of cornmeal.  Slice the top of the loaf.  Cover, and let sit for 30-40 min in a warm place.

Bake at 425 for 35 minutes until golden brown.  You can also place a pan of warm water on the lower rack of the oven to keep the baking environment humid.

This bread was VERY good!  
We like to slice it and grill sandwiches on it.


Monday, April 23, 2012

Andy's Chocolate Covered Raisins - 3 ingredients & 5 simple steps


 Ingredients

1/2 Cup Semi Sweet Chocolate (3 oz)

1/2 Tbsp Coconut Oil

1 Cup Raisins  
(we prefer Sun Maid brand)


Directions:
Step 1. Line a baking sheet with waxed paper OR foil.
Step 2. In a glass bowl microwave the chopped chocolate & oil. Microwave until melted, stirring every 30 seconds to prevent overheating.
Step 3. When the chocolate is smooth, add in the raisins. Stir them until they’re covered well with a thin layer of chocolate.  
Step 4.  Pour the chocolate-covered raisins onto your baking sheet. Spread them out so there aren't any clumps.
Step 5.  Place the baking sheet in your refrigerator for about 15-25 minutes to allow the chocolate to set. 

 There ya go! Three ingredients & five easy steps! They're easy to devour but if you have more self control than we do, they should be stored in your refrigerator in an air-tight container. 
You can thank my husband for this one! 


OXOX,
Julie


Hey, don't leave before entering to win this week's giveaway! All you have to do is comment on any post this week or on our facebook page. Each comment is worth an entry! So go for it!

Wednesday, April 18, 2012

Super Simple Meatball Casserole

This is a 'what I had on hand' recipe I tossed together one night when I realized the hubs would need a quick lunch for the kids tomorrow.  It got such RAVE reviews from my family I think it's a keeper!  This was so good they compared it to a dish we had at Olive Garden!!


Meatball Casserole

What you need:
1 jar white pasta sauce (I used Bertolli Garlic Alfredo)
1 (16oz) package meatballs
1 can petite diced tomatoes (drained)
3/4 c ricotta cheese
3/4 c sour cream
2 eggs
2 t minced garlic
2 t salt
2 t dry Italian seasoning
1 (12oz) package egg noodles (cooked)
2 c Kraft 4 cheese Italian shredded


Directions:
1. Boil pasta according to directions
2. Brown meatballs in skillet, then cut in halves
3. Mix pasta sauce, tomatoes, ricotta, sour cream, eggs, garlic, salt, Italian seasonings in a bowl
4. Pour 1/4 of sauce mix into bottom of greased 9x13 pan
5. Layer meatballs on top of sauce
6. Pour 1/4 of sauce mix over meatballs
7. Mix cooked pasta with remaining sauce mix and pour into pan
8. Top with Kraft Cheese
Cover with foil and bake 350 for 45min, remove foil and bake an add'l 10 min.


I'm sure you could substitute the white sauce with red sauce for a lighter option!  We love to drizzle balsamic vinegar over the top of white sauce dishes for an added layer of flavor.

Wednesday, April 11, 2012

Simple & Satisfying Chili Recipe

This is one of those recipes that I know by heart...those are always the best ones, aren't they?! I've been making it since we were newlyweds & I was still getting comfortable in the kitchen. So, I'm confident that nearly anyone could make this. 

Ingredients:
1 Medium Onion (Chopped)
1 lb Ground Beef or Ground Turkey
1 Packet Chili Seasoning (your preference) 
    OR 1 1/2 Tbsp Homemade Chili Seasoning (or to taste)
1 Can (15oz) Diced Tomatoes (undrained)
1 Can (15oz) Dark Red Kidney Beans (Drained & Rinsed)
1 Can (15oz) Tomato Soup
1 Can Water (or more if you like your chili soupier)

1. In a large skillet (or saucepan), combine & brown the meat and onion. Saute until meat is browned & onion is tender. 
2. Add the undrained tomatoes, drained kidney beans, tomato soup, water & chili seasoning.
3. Bring to a boil, reduce heat to low & cover. Allow to simmer for 15-20 minutes.

I think this could be a great base recipe for chili too, if you don't like it so simple. You could add more beans, or more tomatoes (which I like), add in chopped green pepper, ground sausage...whatever you like in your chili. If you like it saltier, add more salt. If you like it sweeter, add some brown sugar.  It could definitely be more interesting. But we LOVE it simple so I usually make it as the recipe says.


*I love to serve our chili over cornbread & topped with shredded cheddar cheese. Mmmmm! That is THE BEST!

Happy Cooking!
oxox,
Julie

 Don't forget to check out THIS WEEK'S GIVE-AWAY  in honor of our blog-launch!!!


 I made 2 pretty somethings for 2 very lucky people!! I'd love for you to enter! 


Tuesday, April 10, 2012

Spicing Things Up & Sharing My New Secret!


I've never been much of a spice snob...matter of fact, I usually stick to very basic spices & don't care too much what brand or quality they are...but my ways are beginning to change.
I've been working very hard at trying to create better quality meals for my family. We're trying to eliminate many processed & packaged foods from our diet. I'm glad we're doing this, but it can be challenging & TIME consuming to make things from SCRATCH, anybody follow me here?!
Welllll, recently I found this recipe for Homemade Chili & Taco Seasoning from My Baking Addiction. It was perfect! Quick & simple & made enough for multiple uses! But what I liked most is that I knew what ingredients were in it...and it tasted FANTASTIC!  It had the kick of a Medium packet of Chili Seasoning... I prefer a more mild seasoning so I may adjust the cayenne pepper next time, but I am REALLY happy with this recipe!
Tomorrow I'll share my Simple & Satisfying Chili Recipe! It's actually my mother-in-law's recipe...but it's made with this homemade chili seasoning :) It's super!

Happy Cooking, Everyone!!
OXOX,
Julie

*Oh, one more thing!! Don't forget to check out THIS WEEK'S GIVE-AWAY  in honor of our blog-launch!!!
I made 2 pretty somethings for 2 very lucky people!! I'd love for you to enter!


If you do, stop by again & say Hey!

Tuesday, April 3, 2012

Sister See Sister Do - Tasty Tuesday

Cheddar-Jack
Bacon Mac & Cheese


Have you seen one of Kraft's newest products? My grocery stocks it next to their shredded cheese. It's called, Fresh Take Cheese & Breadcrumb mix. Great idea - everything you need (minus chicken) all in one neat little package!

I had a coupon and it was on sale so for .49 I thought I'd give this new product a try.  Instead of using it to coat my chicken I thought I'd try it out with some pasta.  My family loves homemade mac & cheese (which can be time consuming and costly..)  So I'm always trying new recipes to find one we really like.  This one ended up being very creamy and got RAVE reviews!

Cheddar Jack Bacon Mac & Cheese

Ingredients
16oz box Picolini pasta
Fresh Take Cheddar-Jack & Bacon
1 Jar Ragu Classic Alfredo Sauce

-Cook Pasta according to directions on box until al dente.  Drain pasta and set aside.
-In same sauce pan add entire jar of Alfredo sauce, stir in cheese from the Fresh Take package (save breadcrumbs for later).  Stir until creamy and all cheese is melted.
-Add in cooked pasta and stir until combined.
-Pour pasta mixture into greased 9x13 pan
-Sprinkle breadcrumb mixture from Fresh Take over the pasta
-Bake 350 for 20-25 minutes until cheese bubbles


I can't wait to try the other Fresh Take's flavors in my Mac & Cheese Experiments!

Don't forget to comment on this post for a chance to win this week's give-a-way!

-M-

Printer Friendly View

Related Posts Plugin for WordPress, Blogger...