Thursday, October 25, 2012

My Favorite Cookies: Chocolate Chip Salted Caramel Cookies

I love fall!!  I love all the colors and smells and pulling out all my warm sweaters!  I also LOVE these cookies (I'm not a crazy sweets lover but these cookies are too hard to stay away from!).


This is the basic cookie recipe I use for almost every cookie I make:


Basic Cookies
3/4 c salted butter (softened).
3/4 c brown sugar
1/4 c white sugar
mix these together

1 egg
2 tsp vanilla
add these to butter mixture

2 tsp cornstarch
1 tsp baking soda
2 c flour
1/2 t salt (I use sea salt ).
Mix into wet mixture

For Salted Caramel Cookies I mix in:
1 c Milk Chocolate Chunks
1 c Kraft Caramel bits
1/2 c pretzels crushed

Chill for 2 hours (okay you don't have to but it makes for a fluffier cookie letting the butter set back up after the melting).  Plus nothing beats this cookie dough!


Bake 350 for 8-10 min (they may not look done but take them out anyways and let them sit on the cookie sheet until they are cooled).  


 Enjoy!  We like to freeze them in baggies and pull out for lunches during the week too!


What is YOUR favorite Fall Food?

Friday, October 19, 2012

Christmas Thumbprint Trivet

I'm sure you've seen all the great posts all over Pinterest making your own coaster from a tile?  I've been there, done that - love them!  

I saw a cute pin awhile back making Thumbprint Christmas Cards and pinned it all the while keeping in the back of my mind what a great coaster it would make!  When I stopped at Mendards to pick up the coasters I noticed some 6" tiles... Instantly I thought TRIVET!!  (If you're wondering 'what is a tivet'... it is an object placed between a serving dish or bowl and a dining table to protect the table from heat or damage).


So when we were invited to speak at a 'MUMS' (Mother Uplifting Mothers) group locally I instantly thought this would be a super fun craft to show Moms!!


Supplies:

Ceramic Tiles (Coaster .11 or Trivet size .39 at Menards)

Cork or Felt Furniture Protectors (Dollar Tree - 12 for $1)
Permanent Markers (Dollar Tree $1 - package of 8)
Acrylic Paint (.57 a container Wal-mart)
Nail Polish Remover (just in case you make a mistake)

Ready?  
-Dip your thumb into a small bit of paint.  I like to blot once or twice to get the excess off before I put it on the tile.  Press thumb onto tile (spacing your 'lights' out).  
-Once paint has dried - use your permanent marker to draw the string and caps for lights.
-Add a message

Preheat over to 350 - bake tile on baking sheet for 30 minutes to set.  Once cooled add your furniture protectors, one on each corner.


This would make a great affordable Christmas gift and a fun craft to do with your kids!

Make sure you check our others posts for a LACE Trivet and coming next week a couple more ideas for Trivets!!


Tuesday, October 16, 2012

DIY Lace Ceramic Tile Trivet


I'm sure you've seen all the great posts all over Pinterest making your own coaster from a tile?  I've been there, done that - love them!  

 When I stopped at Mendards to pick up the coasters I noticed some 6" tiles... Instantly I thought TRIVET!!  (If you're wondering 'what is a tivet'... it is an object placed between a serving dish or bowl and a dining table to protect the table from heat or damage).


So when we were invited to speak at a 'MUMS' (Mother Uplifting Mothers) group locally I instantly thought this would be a super fun craft to show Moms!!


Supplies:

Ceramic Tiles (Coaster .11 or Trivet size .39 at Menards)

Cork or Felt Furniture Protectors (Dollar Tree - 12 for $1)
Lace - old curtains and tablecloths are great options
Spray Paint (I like the Rustoleum Enamel)

Ready?  
You can follow the same instructions HERE from our DIY Dry Erase Board only use the tile instead of the glass.


Once cooled add your furniture protectors or cork to the bottom.


This would make a great affordable Christmas gift and a fun craft to do with your kids!

Make sure you check our others posts for a Christmas Thumbprint Trivet and a Thanksgiving Turkey Trivet!

Sunday, October 14, 2012

Painted Tire Planter


I've been wanting to do this for awhile now, paint tires for a planter!  We have had this ugly rock garden right outside our Sun room since we moved in.  Honestly I let it go because the thought of digging up all those stones sounded like a lot of work (and it was).


Long story short.  I had a TON of before and after pics on my phone from this Summers projects and when I decided to re-format my phone I lost ALL my pics.  It was a sad day.  So no before pics (it wasn't pretty anyways).

Now I thought it would be EASY to acquire used tires?  No.  Until my Super Awesome Father-in-Law aka 'Big Daddy' heard I was looking for some. He gave me 3 as soon as he heard ;-)

Supplies
Tires
Spray Paint
Dirt
Plants
Rocks/Bricks/Stones


I laid out each tire and spray painted (I did not prime and have not had any peeling or chipping).  When they dried I played with placement and stacking until I was happy.  I filled the tires with bricks/stones that had been in my flower bed (making sure I put bricks in the actual tire to weigh them down).  Then I added the top 1/3 with soil.  Added plants.


Now I did learn WHY there was a rock garden left from the previous owners (down spout from the roof floods the entire garden, washing away all of my mulch...).  Now I'm wishing I wouldn't have filled the tires with the landscape rock ;-(  


Anyone else have any great uses for turning something old into something new?

Tuesday, October 9, 2012

Rolo Pretzel Bites Recipe


Rolo Pretzel Bites
(with Toasted Cinnamon Almonds)


Oh how I love friends who make yummy treats!! My friend Morgan recently made these tasty beauties and brought them along to a baby shower. So I snapped a few pics & decided I needed to share this recipe with our readers! This is one that will be perfect for the holidays! 
...and it's too simple to be true!!


INGREDIENTS

Rolos
Pretzels
A topping (such as almonds, cashews, m&m's, you decide)

DIRECTIONS
  • Preheat the oven to 350 degrees F.
  • Place mini pretzels on a large baking sheet. 
  • Unwrap the Rolos & top each pretzel with one Rolo candy. 
  • Place in the oven for 4-5 minutes, until Rolo candies start to melt - but don't melt them all the way.
  • Remove from oven & lightly press your topper on top of each Rolo (in this case she used toasted cinnamon almonds). 
  • Simply leave on your counter to allow the chocolate to set. (To speed up the process, chill in the freezer for 20 minutes.)


Thanks, Morgan - for sharing your LOVE with us in such a TASTY way!
Love,
Julie

Keep up with us on

Sunday, October 7, 2012

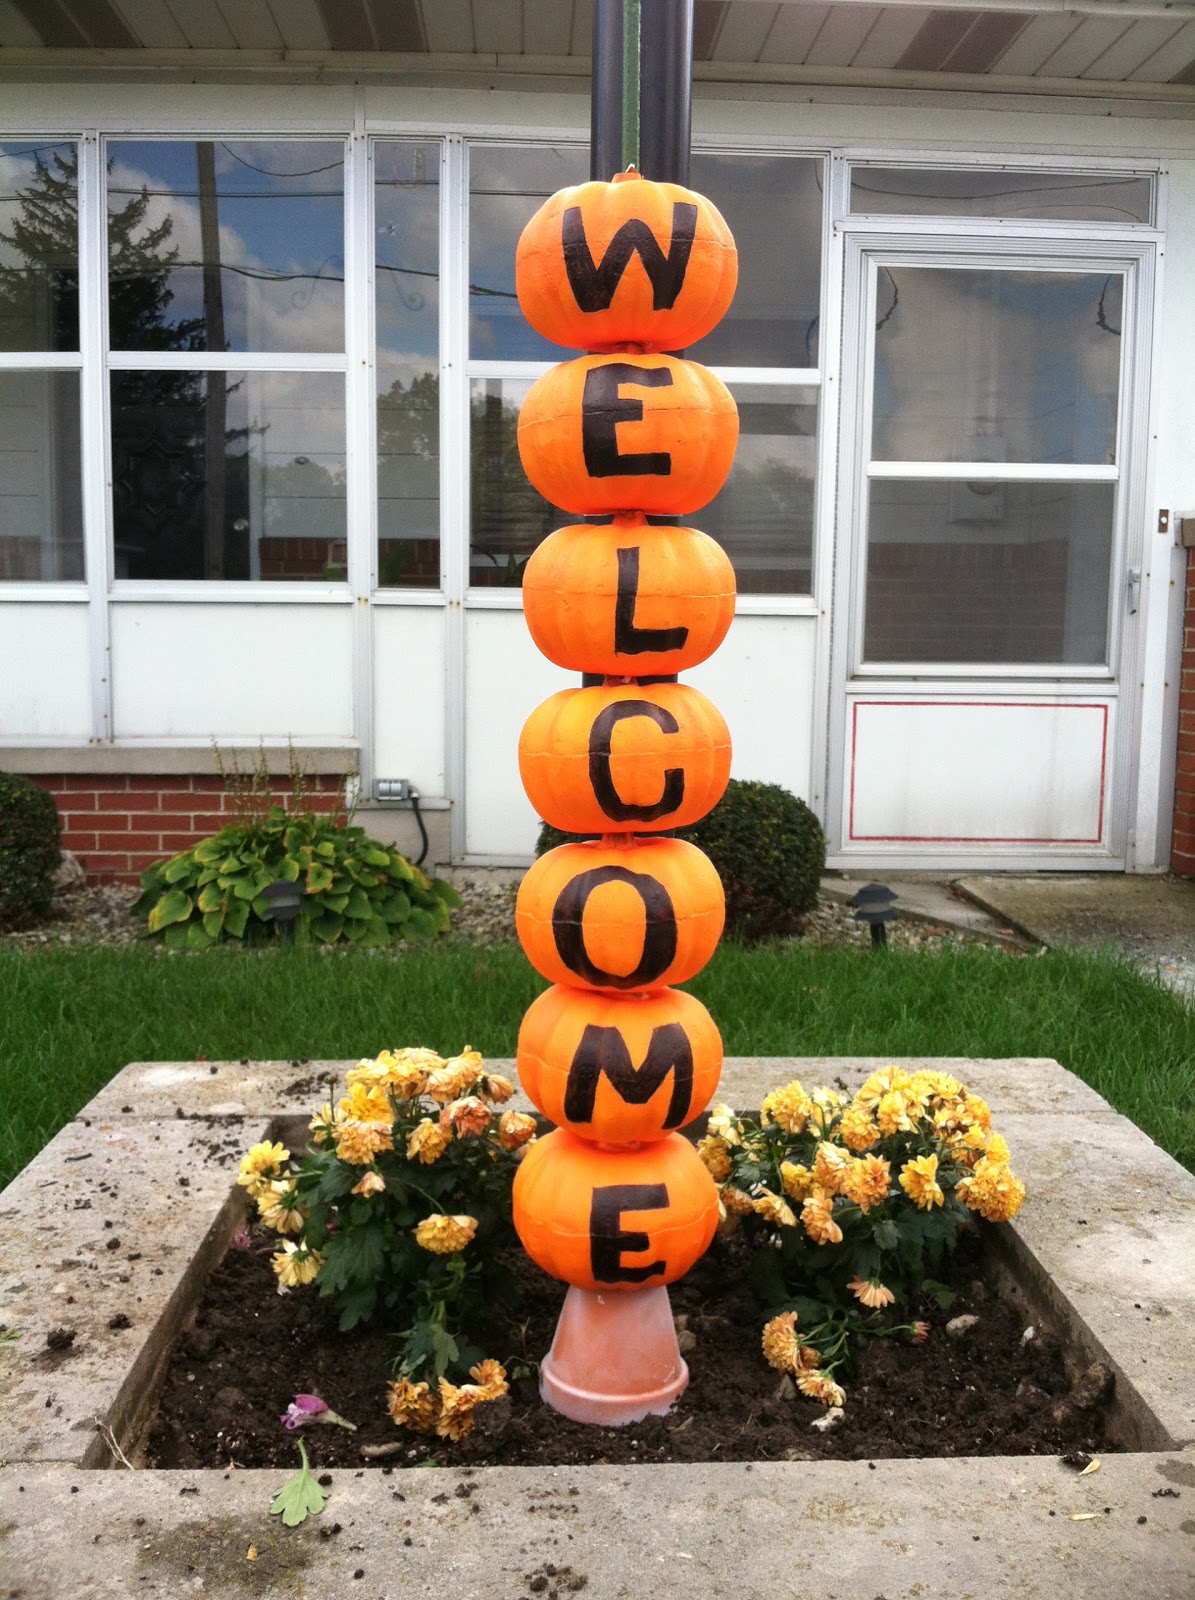
Dollar Store Craft - Welcome Sign Pumpkins!!

This post combines two of my favorite things - Fall & Dollar Store!!  


Supplies
Dollar Tree Pumpkins (as many as you need - $1 each).
Re-bar or some kind of stake long enough for your pumpkins
Permanent Marker (Dollar Tree $1)
Peering Knife (Dollar Tree)
Optional: Pot to keep pumpkins off the ground & fishing line to tie the bar back.


I cut a 3/4" inch hole in both the top and bottom.  Since these are hollow & foam it was messy but simple.


I outlined each letter with a pencil until I got it exactly like I wanted (drawing on an uneven surface can be tricky to get the letter to look even on both sides).  We did WELCOME, possibilities are endless - your last name, house number or a spooky Halloween theme!


I put down a pot first since my flower bed isn't level (I'm hoping it will keep my pumpkins clean too).


Melody had a GREAT time helping with the craft!!  She couldn't wait to put the pumpkins on the stake and it was fun to have her spell 'welcome' backwards ;-)


My finished product!
I added the Mums later - hopefully they'll brighten back up and make for a fun Fall Decoration!  

For another fun Fall Dollar Store craft involving pumpkins - check our Friend Morena's Blog Post!  She also has LOADS of other GREAT Dollar Store Crafts and great Halloween Crafts you and your kids will love!!

Friday, October 5, 2012

Breakfast Cookies Recipe - 2 Versions (Apple Cinnamon Raisin & Chocolate Chip)


HERE IT IS!!!!
This is the recipe I get the most requests for, hands down!
Maybe that's because SO many of us love the idea of cookies for breakfast! And maybe it's because I run into so many people who can't have flour, or eggs?? It's a perfect cookie recipe for them!
I've been making this recipe for a few years & have made it over & over!! I have a few versions of it...The two versions I'm posting are my favorite & are what I consider perfected to fit my family's standards. I can't wait for your feedback!!

VERSION 1:
Apple Cinnamon Raisin Breakfast Cookies
3 Large Ripe Bananas, Mashed
1 Apple, peeled & chopped (I use Granny Smith or Macintosh)
2 1/2 Cups Quick Oats
1/3 Cup Honey (OR 1/2 Cup Sugar if you dare)
1/3 Cup Applesauce
1 tsp Vanilla Extract
1/2 tsp Cinnamon
1/2 Cup Raisins
*I also like to add a pinch of nutmeg, and/or walnuts if I have them on hand*


VERSION 2:
Chocolate Chip Breakfast Cookies
3 Large Ripe Bananas, Mashed
2 1/2 Cups Quick Oats
1/3 Cup Honey (OR 1/2 Cup Sugar)
1/3 Cup Applesauce
1 1/2 tsp Vanilla
1/2 Cup Mini-Chocolate Chips


DIRECTIONS
Preheat oven to 350 degrees.
Mix all ingredients together thoroughly and allow to sit for 15 minutes.


Spray cookie sheet with nonstick cooking spray.
Drop by teaspoonfuls onto cookie sheet, flatten into cookie shape by pressing down with a fork.


Bake for 20 minutes or until brown.


Good...


 morning!

I don't think I need to explain how awesome it is to have cookies for breakfast, nor do I need to tell you all the reasons you should make these & have them around.  But I am going to mention that these cookies not only make a wonderful & filling breakfast, but they also make a great snack for kids AND grown-ups! Hello!!!! I'm not going to deny that I am a full-grown cookie monster!!!

Happy baking, my friends!!!
Love,
Julie

Come join us on 

Printer Friendly View

Related Posts Plugin for WordPress, Blogger...